Modern laptops mostly come with a built-in Wifi card right out of the box. Even though it’s a bit rare to find a desktop PC with a built-in card, you can still add it manually at a later date. If the motherboard Wifi abruptly fails to work, it sure is bewildering. And that’s exactly the reason why we are here. So, in this guide, we’ll look at all the causes for your failed motherboard wifi and understand their potential fixes as well. By the end of this guide, you’ll be able to efficiently fix your Wifi and get back on the internet in no time. Now, let’s get straight to the point.
Why Is My Motherboard Wifi Not Working?
How to Fix Motherboard’s Wifi Not Working
Before moving on to the technical fixes, it’s important to verify that the problem is within your computer and not in the router. Most often, when your motherboard Wifi is not working, you’ll not see the Wifi symbol on the Windows taskbar. And sometimes, even if you do see the Wifi sign, your computer will not be able to locate the wireless signals. Also, check if your Wifi device is visible on the device manager because a failed motherboard wifi often does not recognize the related device. So, check if the Wifi works on other devices or not. Furthermore, using this same PC, connect to the ethernet to see how it operates. If the ethernet works but the wifi doesn’t, the methods listed below can help you fix your motherboard wifi connection.
Check if Your NIC Is Working Properly
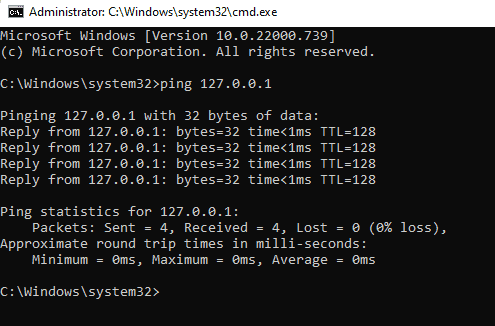
The network interface card (NIC) can be described as a bridge between your computer and the internet. Your computer first transfers your internet browsing request to the network card, which then converts it into electric impulses. So, without a fully functioning NIC, it’s not possible for you to connect to the internet. So, first and foremost, you have to ensure that your NIC is operating properly. For this,
Enable Your Wifi Device
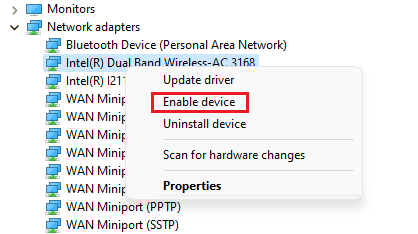
There is always a possibility that your Wifi adapter is disabled on your computer’s device manager, knowingly or unknowingly. So, check your Wifi’s status and enable it for an easy fix. For this,
Diagnose Your Wireless Adapter
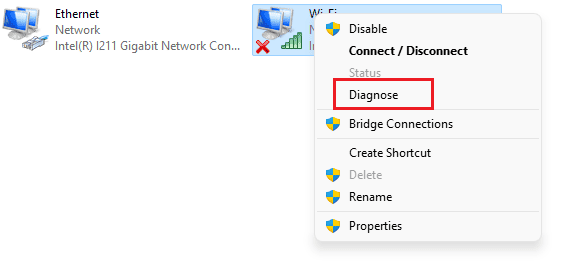
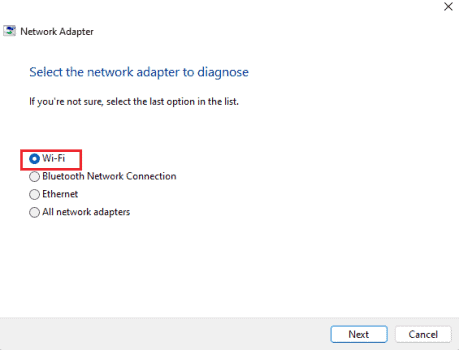
Although a pretty under-utilized feature, diagnosing your wireless adapter can find hidden bugs and glitches within the system. It’s an alternative way to troubleshoot your network adapter, and hence a diagnosis can fix your motherboard wifi issues. The steps below show how you can diagnose your network adapter.
(Re)install Wifi Drivers
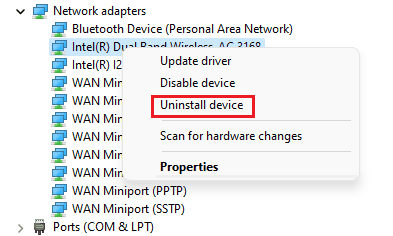
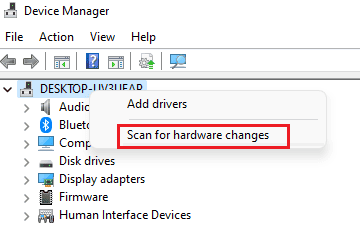
A device driver gives hardware devices a software interface to operate with. Drivers are required for your hardware device to work properly because it oversees the communication between the device and the operating system. So if you have not installed wifi drivers on your system, doing so will surely fix your problem. To do this, you have to visit your device manufacturer’s website and download the latest wifi driver that is available for your system. However, if a wifi driver was previously installed on your system, you can reinstall it to paste a fresh copy of system files. Even though reinstallation of your wifi driver sounds underwhelming, it is still a useful process to discard the bugs that were seen on the previous install, making it fast and efficient. Here are the steps to reinstall a wifi driver:
Reset Your Network Settings
Resetting your network settings will erase all network-related data from your computer. This includes your saved sites, passwords, and network cache, among other things. Hence, a network reset sets up new data on your system and can ultimately fix your motherboard wifi issues. Here are the steps to do so:
Reset the Network Stack
This fix is a bit more technical than previous ones but has a pretty straightforward workflow. That is, resetting the network stack will reset the DNS server, IP subnet mask, and other IP protocol settings as well. It also clears the network cache, corrupted or otherwise. So, to reset the network stack,
Install All Windows Updates
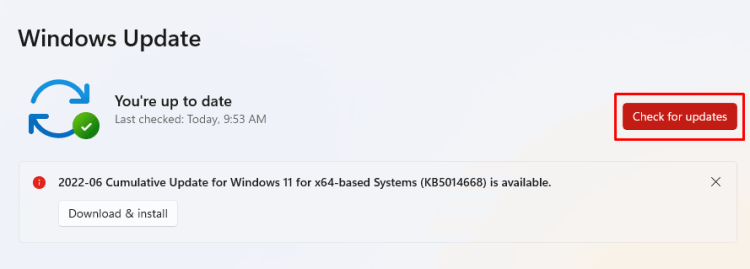
Installing the latest Windows updates keeps your operating system and Microsoft applications fresh and updated. So, the latest Windows update can incorporate enhancements and patches to ensure your system is free of bugs and glitches. Hence, by installing all available windows updates can see that your motherboard wifi is up and running. To do this,
Update Your Chipset Drivers
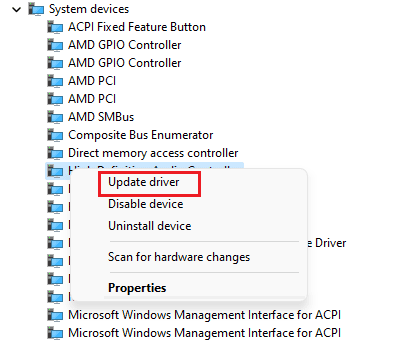
Latest chipset drivers are required to ensure that your motherboard, operating system, and your hardware devices work together in a well-mannered and well-organized way. An outdated chipset driver often results in configuration errors and system failures. Since your motherboard wifi failing to work might be a result of an outdated chipset driver, updating it could help you fix your problem. Here are the steps to do so: Alternatively, you can also update your chipset driver by visiting your motherboard manufacturer’s website and downloading the latest driver available for your system.
What Can I Do if My Motherboard Wifi Keeps Disconnecting?
If and when your Wifi doesn’t work correctly and keeps getting disconnected time and again, there are a few workarounds you can follow. The fixes are listed below to help you fix your unpredictable wifi connection.
Restart Your Router
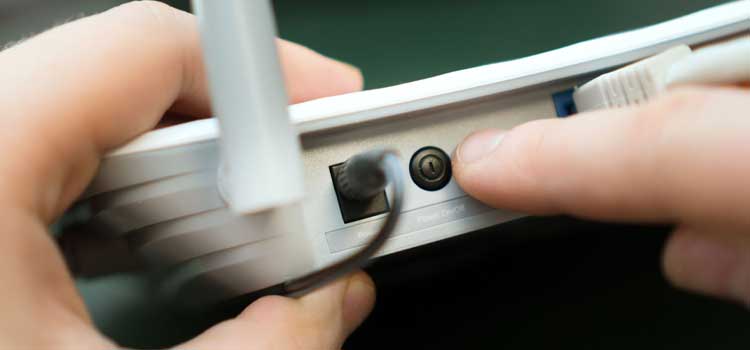
A super quick and super effective way to fix your unreliable wireless connection is a simple router restart. Restarting your router will break the network traffic and reset the connectivity settings to get your internet connection back on track. So, for this,
Check Your Wifi Details
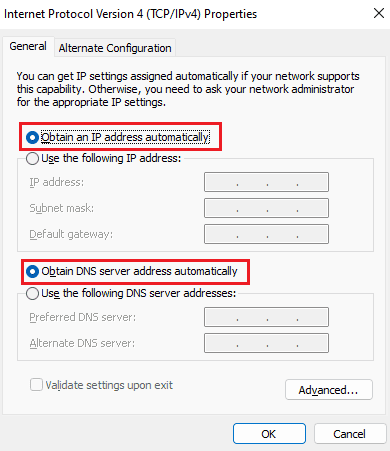
A misconfigured network can influence your system to fail to recognize the Wifi connected to your computer. So, the issue of your motherboard Wifi failing to work can be traced back to incompatible wifi details. Hence, changing these details to make your system extract network information automatically can fix your problem. So,
Run the Network Troubleshooter
To solve problems regarding your network connectivity and connection compatibility, running the network troubleshooter shall scan for and fix these issues. So, you can run the network troubleshooter by following the steps shown below. For this:
Update Your Wifi Drivers
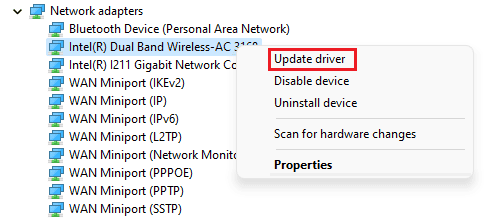
An outdated wifi driver results in an unreliable wifi connection. So, updating the wifi driver to the latest build can fix your disconnecting Wifi issues. Here are the steps to do so:
Rollback the Wifi Drivers
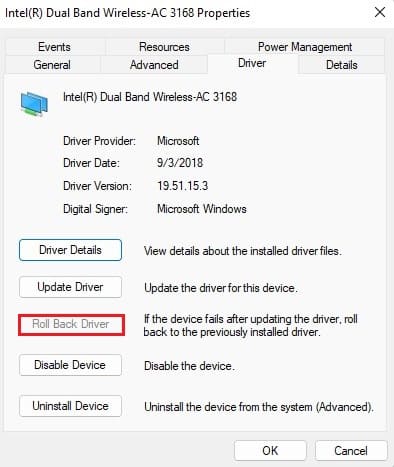
If your wifi connection started disconnecting frequently after the latest driver update, then rolling the driver back to the previous build can fix your problem. So, the rollback feature uninstalls the latest driver build and incorporates a previous build on your system. Here’s the way to rollback the wifi driver:
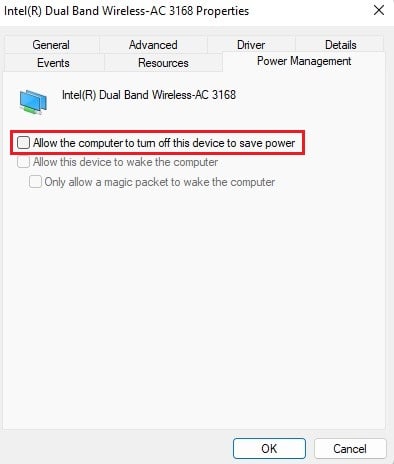
Change the Power Management Setting for Your Wifi
Although the Windows power management setting conserves your computer’s battery life, it can also disable certain features and applications from running at full capacity. So, try to temporarily disable this power management setting and see whether it solves your problem or not. Follow the steps shown below to do so.
