Normally, users without experience should not attempt to repair a broken charger. If your charger is broken, replace it or get a professional to fix it. However, if the damage is in the cable and you are in a pinch, you might be able to replace the damaged cable. The two most prominent causes of a non-functioning charger are broken cable due to excessive and repeated flexing and failed electrolytic capacitors in the charger circuitry. Thus, you will need to repair either the cable or the circuitry to fix a broken laptop charger. The fix below is for users experienced in handling electric circuitry only.
Things to Consider Before Deciding the Charger is Broken
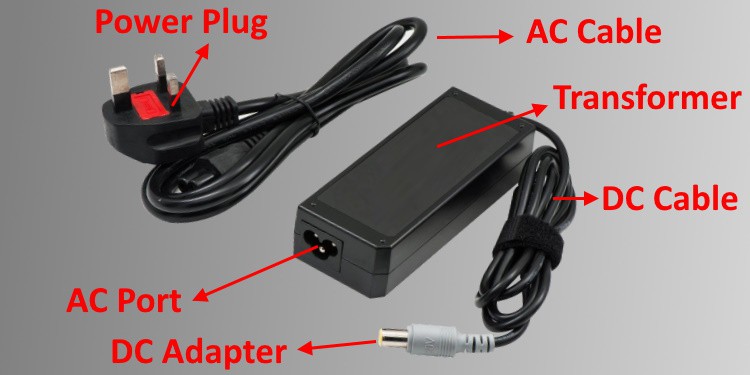
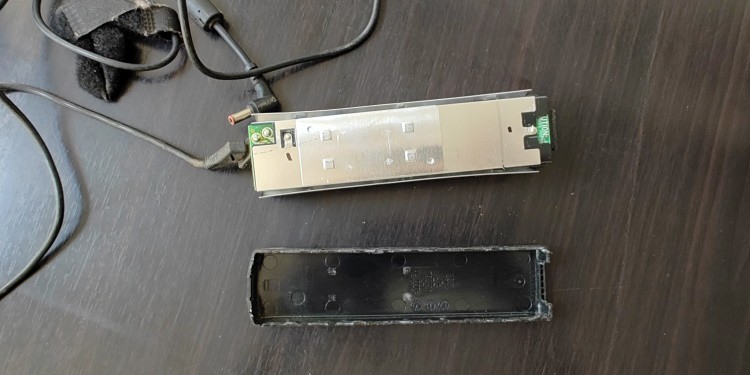
Laptop Charger Components
A laptop charger, also known as an AC adapter, is a device that houses a transformer to convert high voltage of your household AC circuit to a lower voltage, and a rectifier to convert the AC power signal to DC. It also consists of various filters and safety circuits depending upon the capacity and quality of manufacturing of the charger. Visually, you are able to identify the following distinct parts in a charger: The power plug, AC cable and AC adapter are part of a single cable that plugs to the AC wall socket at one end and the charging block at the other end. This is a standalone piece of cable that can be detached from the charging block. The transformer is housed inside the charging block as it is normally not accessible. You must be careful if you intend to open and expose the transformer since the circuitry consists of numerous capacitors. The DC cable and adapter makes up the rest of the charger. The DC adapter is usually a barrel plug that you plug into the laptop. Unlike the AC cable, the end of the DC cable that goes into the charging block is soldered into the circuit board inside and you cannot remove it.
Tools Required to Fix Broken Charger
If you have decided that you want to fix your broken charger, you will need the following tools to complete the task successfully:
Charger Diagnosis and Repair
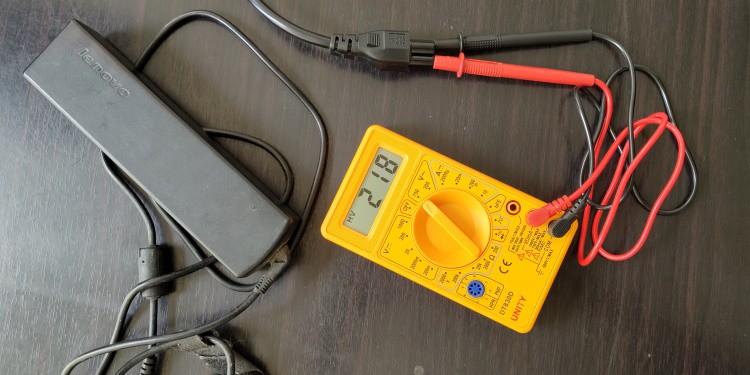
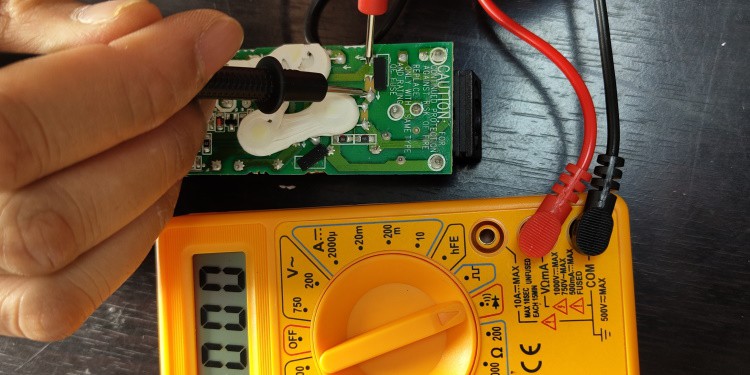
You will use a multimeter to identify the problematic area in the laptop charger. Make sure you are familiar with the multimeter you are using and then proceed ahead with the diagnosis.
Check the AC Cable Side of the Charger
You should be able to procure a compatible replacement AC cable easily from online retailers or your local store.
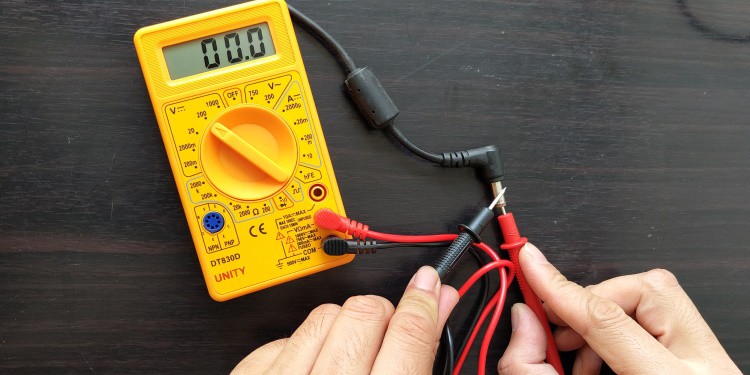
Check the DC Cable Side of the Charger
If you get a correct voltage output reading on the DC adapter, then the problem lies within the laptop and not with the charger.
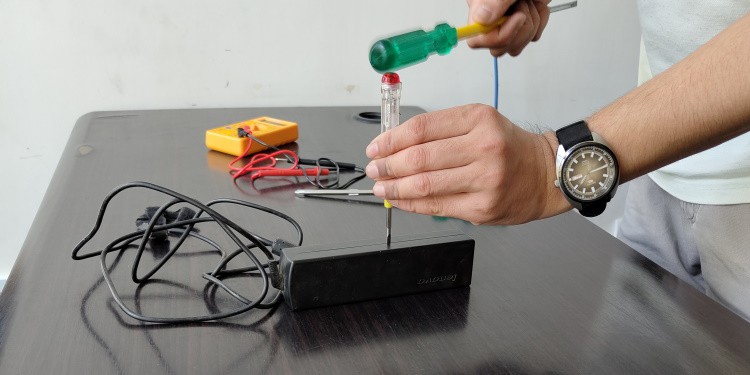
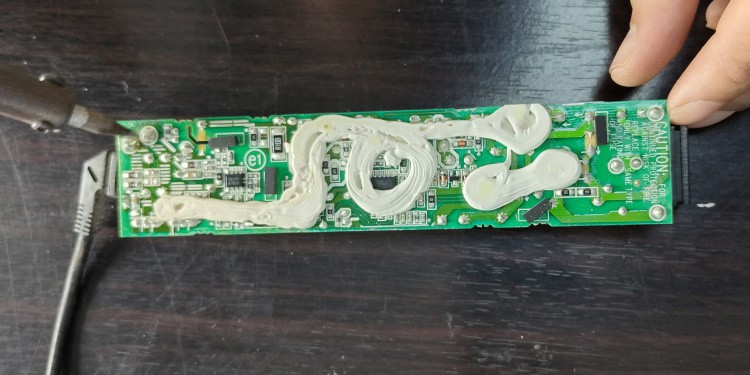
Diagnose the Transformer and Replace DC Cable
If the Fuse is Blown
A blown fuse indicates a problem with the primary circuit of the charger. While most of the time, this is caused by a failed electrolytic capacitor, it could also be caused by other faulty components in the circuitry. The full diagnosis of a failed transformer is out of scope of this article, and we recommend you either get professional help, or get a replacement charging brick.
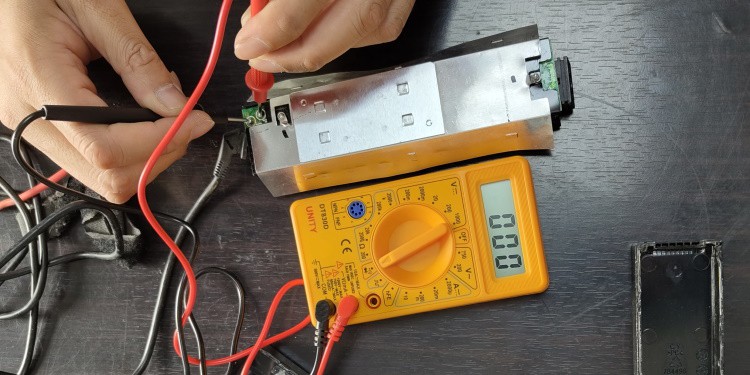
If the Fuse is in Working Condition
A fuse is a circuit component which acts as a safety device. It protects your circuit from overcurrent. Thus, if you have an intact fuse, there is a very good chance that your transform circuit works properly. Therefore, the problem most likely lies with the DC cable. In this case, you will need a compatible replacement DC cable. However, let’s make sure that this is indeed the case.