This article will show you the best way to remove keycaps – which is via a special device as well as best practices and common pitfalls to avoid.
When to Remove Keyboard Keys
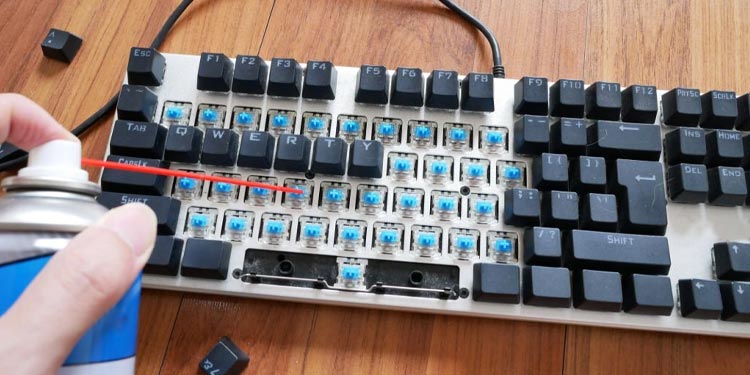
Safety Tips Before You Remove Your Keyboard Caps
Although removing your keyboard caps is relatively straightforward, I’ve still managed to break down a few keyboards in the past due to not knowing how to remove keycaps properly. Here is a short list of things to watch out for when doing this:
Certain keys might also be secured in place by thin metal wires to stabilize them when pressed. This is most commonly present on the space bar and the other larger keys. If you remove such keys improperly without disconnecting the metal stabilizers, you can end up damaging your keyboard.When pulling a keycap, never use force in a direction other than pulling the key straight up or pressing it down. Removing the keyboard’s keys sideways can permanently damage the plastic injection connecting the key to the switches. Even if the key is hard to properly hold while being removed, always pull it straight up as precisely as possible. Suppose you feel any resistance when trying to remove a single key. In that case, you might be grabbing the delicate mechanical switch below it and damaging the plastic fittings. Removing a single key cap from your keyboard should never require anything beyond light force or pressure. Check if your keyboards keys are not soldered to the switches. Some keyboards on the market don’t feature takedown keys, and even if your keyboard is marketed as mechanical doesn’t automatically mean that the keys are removable without disassembling your keyboard first.
How to Remove Mechanical Keys?
The best way to safely and quickly remove your mechanical keyboards keys is to use either a specialized plastic key remover or a wire keycap puller. The latter works best, but most mechanical keyboards come with just a basic plastic keycap remover. Please note that the plastic version is less likely to scratch your keys as opposed to the metal wire one, so be careful when using it. If you are unsure what it looks like, it’s usually a plastic ring shape with two short extensions on the sides to grip the keys. After your keycap remover of choice, follow these steps:
Insert the Keyboard Cap Remover on Top of the Key
As the step’s name suggests, it’s exactly what you need to do first. Note that if you are using either a plastic keycap puller or a metal wire one, in both instances, you should hear and feel the ends snapping onto the back side of your keys. If you are using a plastic double-sided keycap remover, always align it horizontally when snapping it onto a key, as the keycaps are naturally angled to the side and thus have more space for the keycap to fit. If, for whatever reason, you are using just your bare hands, remove the adjacent ones next to it if you find the key hard to access and grip properly. Suppose you want to remove the “Q” key – start by removing the 1,2,3, ~, tab, and caps lock keys. Otherwise, it’s nearly impossible to remove a key that is surrounded by others with just your fingers.
Carefully Pull the Key Out of the Keyboard
Gently wiggle the keycap sideways as you pull it straight to the top. Start with a pull force and slowly increase the force until the keycap is removed. Larger keys might require slightly more force to pull than smaller ones. Keep the stabilizers in mind for the space and enter keys. With these keys, it’s best to remove them by pulling from one corner side and then from the other (for the space key). If your space key is connected with just one mechanical switch in the middle and without any stabilizers (like on my keyboard), have the keycap remover in the middle and pull it towards the top.
How Do I Put My Keys Back on the Keyboard?
Putting your mechanical keyboard keys back on is as simple as aligning them gently and adequately pressing them onto the mechanical plastic retention bit, there are however a few nuances that shouldn’t be overlooked. Here are the exact steps to putting your keyboard caps back on: After all the keys are assembled, see if the different keys give the correct input, if not you probably switched up two or more keys in the wrong slots.
Related Questions
Can I Remove Keys on Non-Mechanical Keyboards?
The short answer is yes; the long answer is that it depends. Like we mentioned above, some keyboard caps are soldered – meaning that it’s a single piece between the switch and the key, and it can’t be just removed. This depends solely on your exact keyboard manufacturer and model. Some keyboards that feature flat keys can be incredibly difficult to take down properly.
Could I Remove Keycaps on Laptop Keyboards?
Unless your laptop is incredibly high-end and features a mechanical keyboard with easy takedown keys, never attempt to remove laptop keys just by pulling them like you would on a mechanical keyboard. Laptop keys are much more intricate and house multiple small parts that can easily get damaged if you apply too much force. Additionally, many laptop keyboards are not accessible for takedown or maintenance unless you disassemble the whole laptop.
Will Changing the Key Symbols Also Change the Input?
No, even though you put a differently-named key onto your keyboard, the input remains the same as the specific command is already soldered onto that specific mechanical switch. Nonetheless, it’s a good practice to put the keys in the wrong place to prank your gamer friends.