Unless the only fix for you is to buy a USB ethernet adapter, this guide shall take you through all the alternative methods you can seek to fix your port issues from the comfort of your home. Continue following the guide till the end to fully understand the problem and potentially fix your issue. So, let’s being!
Why Is My Ethernet Port Not Working?
Your ethernet port is probably electrostatic-sensitive. That means, there is always a possibility of your port failing to function due to the built-up static charges within it.
How to Fix Ethernet Port Not Working
There are a ton of methods to fix your ethernet connection and its port in the motherboard. The definitive fix for your issue could differ from other users. However, as we are here to help you, we advise you to follow all the methods listed below until your problem gets resolved.
Ensure Your Ethernet Port Is Not Bad or Broken
First things first, you have to ensure that your ethernet port is not bad or broken. Usually, when you insert the LAN cable with a certain amount of force, the port is affected by a certain amount of stress, corresponding to the force applied. This may cause the port to break down, leaving you in a frustrating and confusing situation. So, plug in your ethernet cable and check if the port is lighting up or not. If it is, then it generally signifies a fully functioning port. Additionally, you have to ensure your cable is not damaged or broken. So, turn on a different computer and try to connect to the internet using the same cable. If it fails to connect, your cable may be damaged and you would have to purchase a new one.
Ensure Your Network Interface Card Is Working Properly
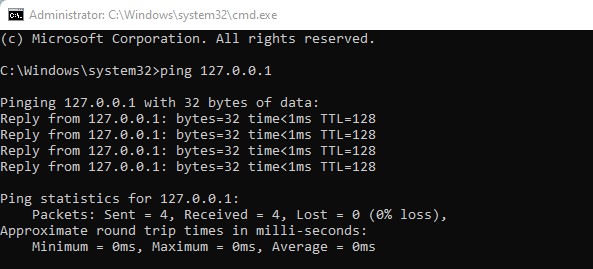
The network card must work properly in order for you to connect to the internet. It acts as a mediator between your computer and the internet. Any request you make for surfing the web is first transferred to your network card, which in turn converts this request into electric impulses. So, a damaged NIC (network interface card) prevents you from accessing the internet. Hence, you have to ensure your network card is working properly by pinging the loopback address. Here are the steps to do so:
Enable Ethernet Connection
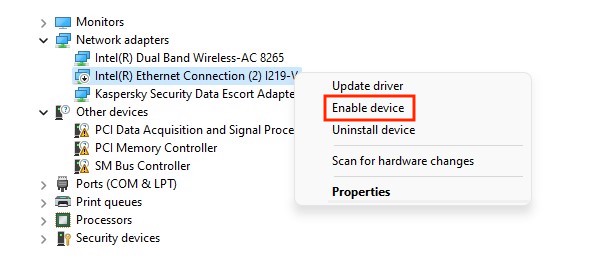
This step might feel too simple to be true, but a disabled ethernet connection often causes confusion during stressful scenarios. So, it’s better to check the status of your ethernet connection before diving into any technical stuff.
Check Your Network Details
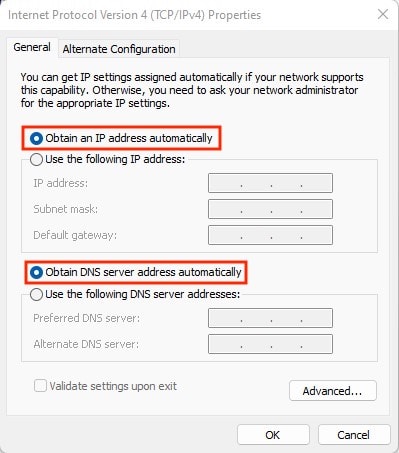
In scenarios where your system fails to recognize the ethernet connection, the network details are often found to be misconfigured. So, a wrong configuration of your network settings can also make your port seem nonfunctional. Hence, we have to be sure that your system can extract the network information automatically. And the steps to do so are as follows:
Run the Network Troubleshooter
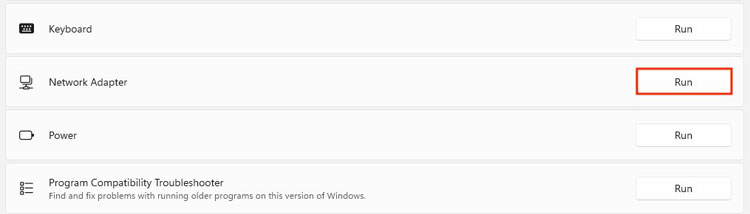
The network troubleshooter on Windows can automatically scan for, detect and fix certain issues regarding your internet connection and the network adapter. Hence, you can let Windows figure out and solve the issue itself. For this:
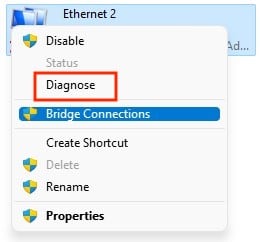
Diagnose Your Network Adapter
Diagnosing your ethernet adapter can bring light to the hidden issues within this adapter. You can easily diagnose your network adapter through the control panel and this provides an alternative way of troubleshooting your problem. Here are the steps to do so:
Turn Off Antivirus Software
Not all antivirus software is compatible with your broadband connection and can hence, block the information flow to and fro between your system and the network. This can cause certain glitches within your system and can make it seem like there is no internet connection at all. So, when your computer is not accepting the network signal, the ethernet port may seem dysfunctional as well. You can disable any antivirus software you own to try and fix your issue. Third-party antivirus software you own can be seen on the Windows taskbar’s system tray. So, from here, simply right-click on your antivirus and select Disable.
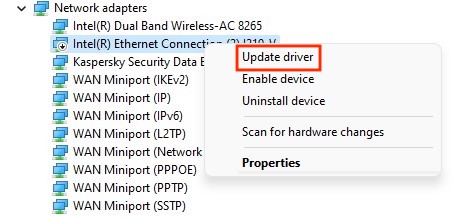
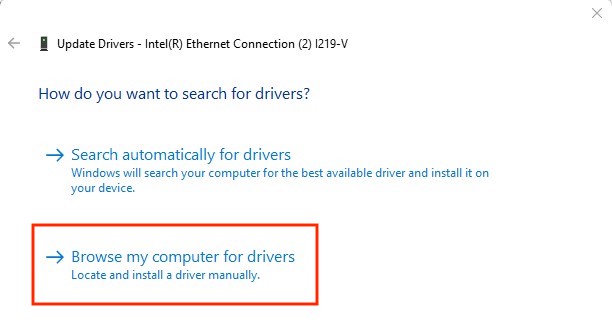
Update the Network Driver
The ethernet port on your motherboard cannot recognize your network adapter if the network driver is outdated. So, it’s important to update this driver to the latest built. A fresh update can incorporate newer system patches on your device, and your port could be up and running in no time. This step is vital if your ethernet port works on an older system but not on a newer motherboard, especially on the one you built yourself. So, the steps below show how you can update your network driver:
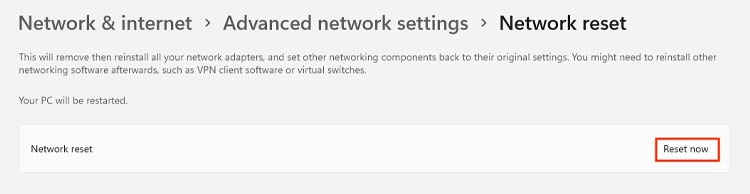
Reset Your Network Settings
Resetting your network settings is known to fix certain connection issues regarding both the ethernet and Wifi. So, it’s as straightforward as it sounds. A network reset will erase all the network and internet-related data stored on your computer. Hence, the corrupted network cache and configurations will be fixed, which can in turn fix your ethernet port issues. So,
Reset Network Stack
The network stack is a set of network protocols that transfers data to and fro between two devices. So, resetting a network stack resets the IP subnet mask, DNS server, and other IP protocol settings. It clears the network cache and is known to fix configuration errors as well. To reset the network stack, follow these steps below:
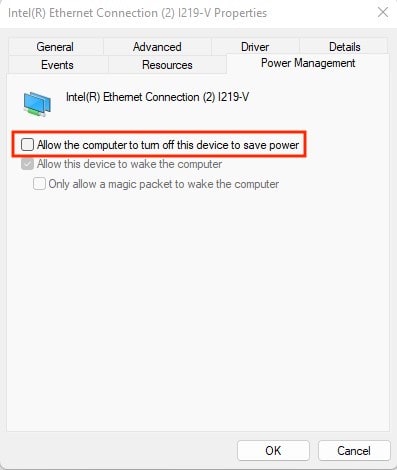
Change Your Ethernet Adapter’s Power Management Settings
At times, the Windows power management tool feels tricky. On the one hand, it conserves your battery life and on the other, it sometimes disables certain system features and applications from operating at full power. So, for now, it’s wise to turn off this setting and find out whether it fixes your issue or not. Here’s how to do so:
Disable EEE for Your Network Adapter
The EEE (Energy Efficient Ethernet) is a networking standard designed to reduce the total power consumption of the physical layer ethernet devices (e.g. a modem) by 50% or more. This enables the ethernet to use power only while transmitting data. So, disabling the EEE could help fix your ethernet connection and the ethernet port issues as well. The steps to disable EEE are:
What to Do if My Ethernet Works but the Port Doesn’t?
Let’s say you tested your ethernet cable on a different system, and it turns out to work just fine. But, the ethernet port on your motherboard doesn’t seem to function or “wake up” no matter which aforementioned steps you followed. In such a case, your first instinct should be to ensure that the port is lint and dust-free. However, ethernet ports are often prone to damage and degradation. The connectors on your motherboard are prone to breakage and a faulty port often returns a Network cable unplugged error on your screen. So, this section mainly focuses on the fixes and workarounds you can apply when your ethernet works but the port doesn’t.
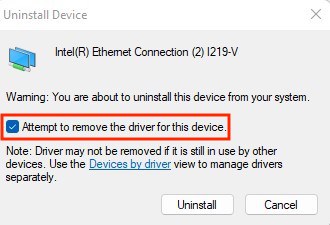
Reinstall Network Driver
You can completely delete the ethernet adapter from your system and reinstall a fresh copy of it. This is useful because reinstalling your network driver discards the bugs and glitches that came along with the previous build. The installer’s temporary, probably buggy, files from your system are also discarded and this frees up a significant amount of storage as well. So, reinstalling the network driver can bring your port back to life. This can also help with the port not lighting up the issue. The steps below show how to do it:
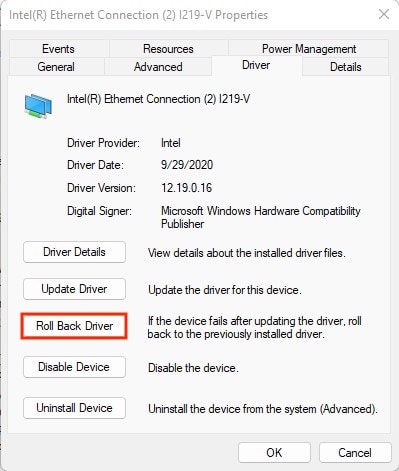
Rollback the Network Driver
If your ethernet port started to show signs of problems after installing a new driver update, then rolling it back to the previous one could fix your issue. This could light the ethernet port back up and see you surfing the web in no time. So, here’s how you can rollback your network driver:
Unload Power From Your PC
Unloading power completely from a computer seems to fix some minor hardware issues on your system. The main goal is to dissipate all the electricity from your computer and restart it in hopes of fixing your problem. This too can help with the issue of your ethernet port failing to light up. So,
Enable Ethernet Adapter on BIOS
The BIOS is a sensitive place to play around in. A slight change in the BIOS can see your computer’s function in a totally different manner. The ethernet connection might be disabled on the BIOS, either by you (knowing or unknowingly) or by default by your motherboard manufacturer. So, you can (re)enable the ethernet adapter on the BIOS to allow your port to light up and function properly. Here’s how to do so:
Use a USB to Ethernet Adapter
If nothing works, the only thing you can possibly do is to invest in a USB to ethernet adapter. It is a device that’s capable of connecting the ethernet cable to a USB port. It returns a plug-n-play feature, which means, you can just plug the USB into your computer, plug the ethernet cable into the adapter and directly connect to the internet.